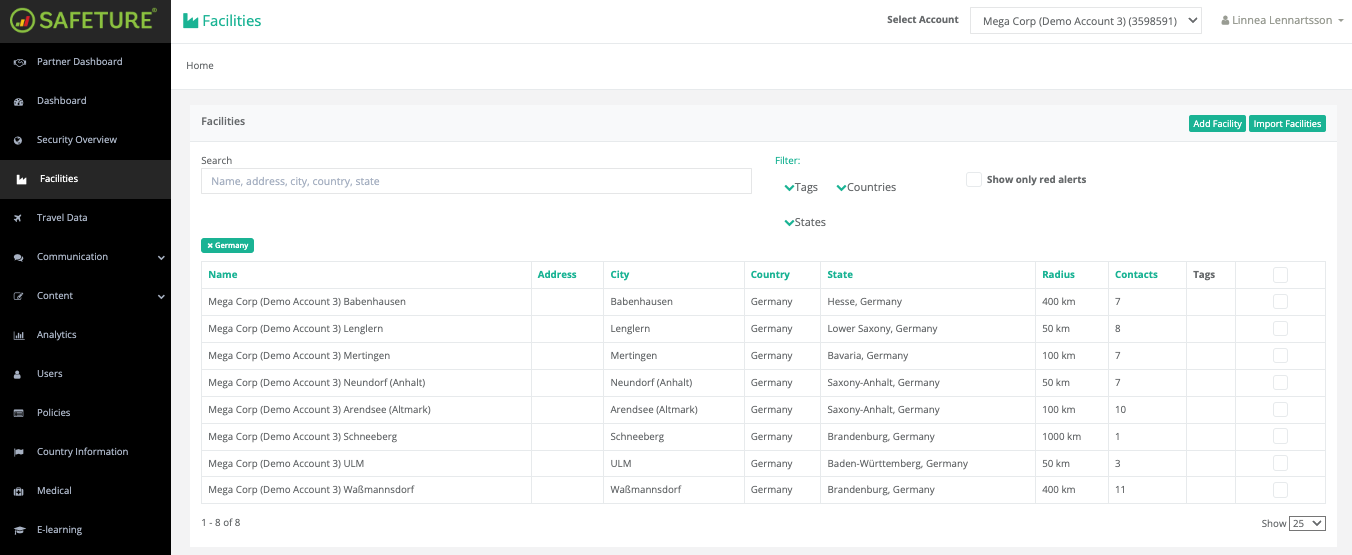
A facility is a designated, static location within an organization, such as an office, factory, or warehouse. If an incident occurs nearby and you have facilities added to your account, you can quickly mass-communicate with everyone at a specific facility.
Follow these steps to add Facilities in the web portal:
-
Access Facilities
Go to 'Facilities' in the web portal menu. -
Choose Import Method
Select an import method that best suits your needs. There are three options: Manual Import, Spreadsheet Import and API.
Method 1: Manual Import
Add facilities one by one.
-
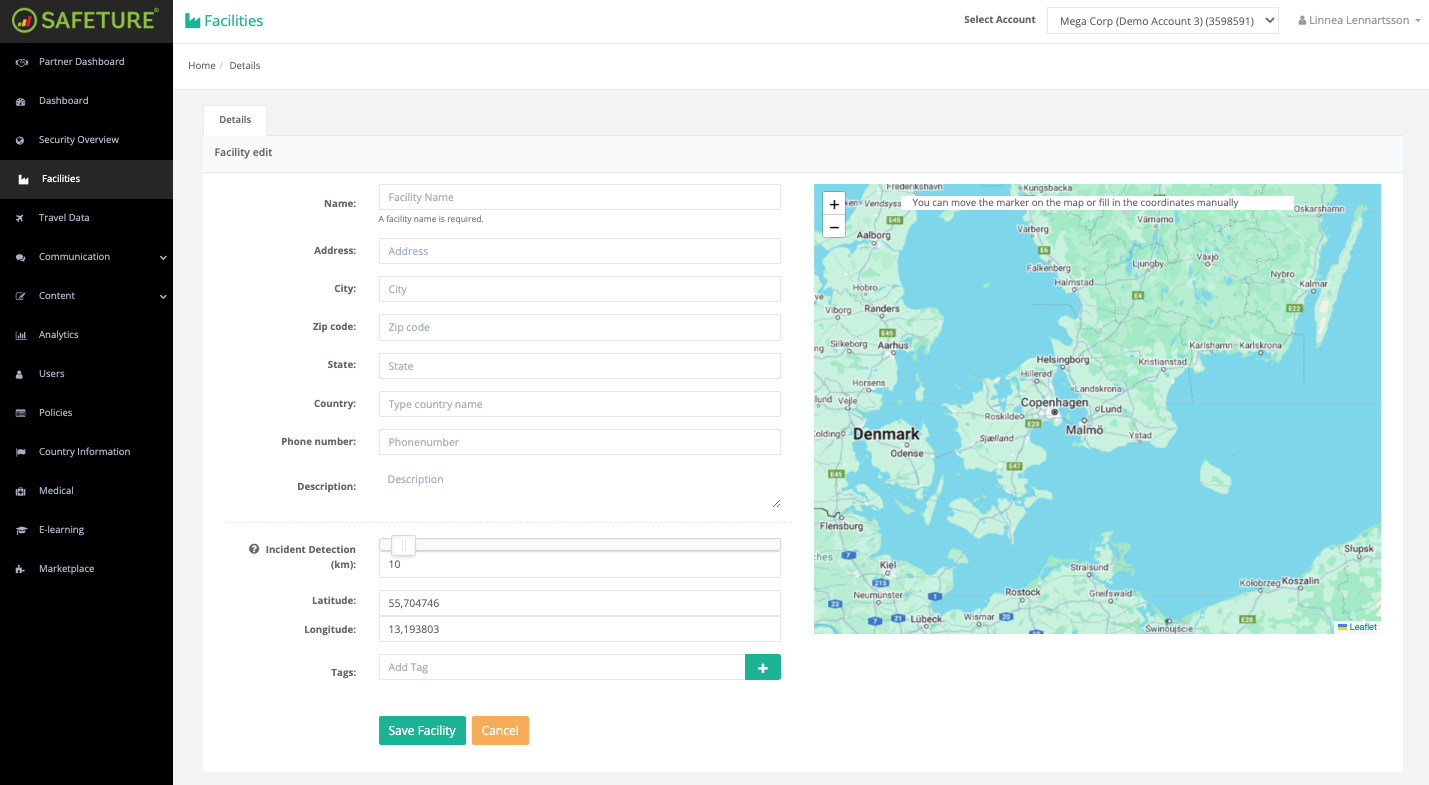
Step 1: Add Facility
Click “Add Facility” to begin adding a single location. -
Step 2: Enter Facility Address
Search for the address, selecting the correct option from the results. -
Step 3: Name the Facility
Provide a descriptive name for the facility (this is required). -
Step 4: Verify Address Details
Ensure the address fields (address, city, zip code, state, country) are accurate. Update as needed. -
Step 5: Add Additional Details
-
Phone Number: Enter a general phone number if available; otherwise, leave it blank.
-
Facility Description: Include a brief description for other administrators to see.
-
-
Step 6: Set Incident Detection Radius
Define the notification radius (in kilometers) around the facility. If an incident occurs within this radius, administrators will receive alerts. -
Step 7: Add Tags and Save
Tag the facility for easy categorization (e.g., “Office, Factory, England”). Click “Save Facility” to finalize.
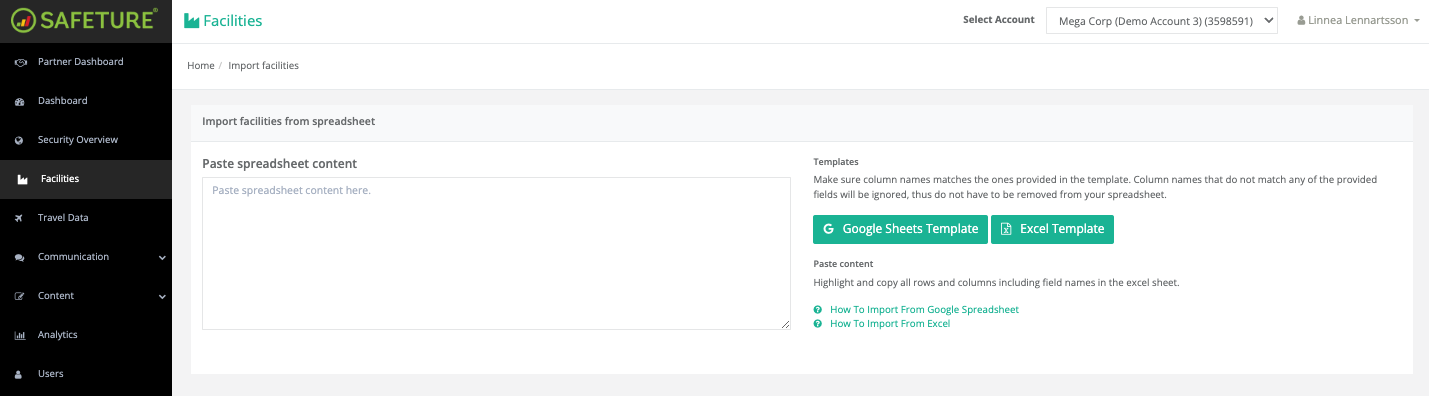
Method 2: Spreadsheet Import
To add multiple facilities at once:
-
Step 1: Import Facilities
Click “Import Facilities.” -
Step 2: Download and Complete the Template
Download the template as an Excel or Google Sheets file. Fill in your facility information. -
Step 3: Paste Spreadsheet Data
Copy and paste all rows, columns, and headers from the spreadsheet into the portal. -
Step 4: Final Edits and Add Facilities
Review the data, make any necessary adjustments, and click “Add Facilities” to complete the import.