Manage an ongoing Safety Check
This guide explains how administrators can manage ongoing Safety Checks in the Safeture Web Portal.
Access an ongoing Safety Check
Once a Safety Check is initiated, it appears in the Safety Checks list. Active Safety Checks are labeled In Progress. To view details, click View on the right-hand side of the row. This will take you to the Safety Check Details page with the Reach Out Overview.
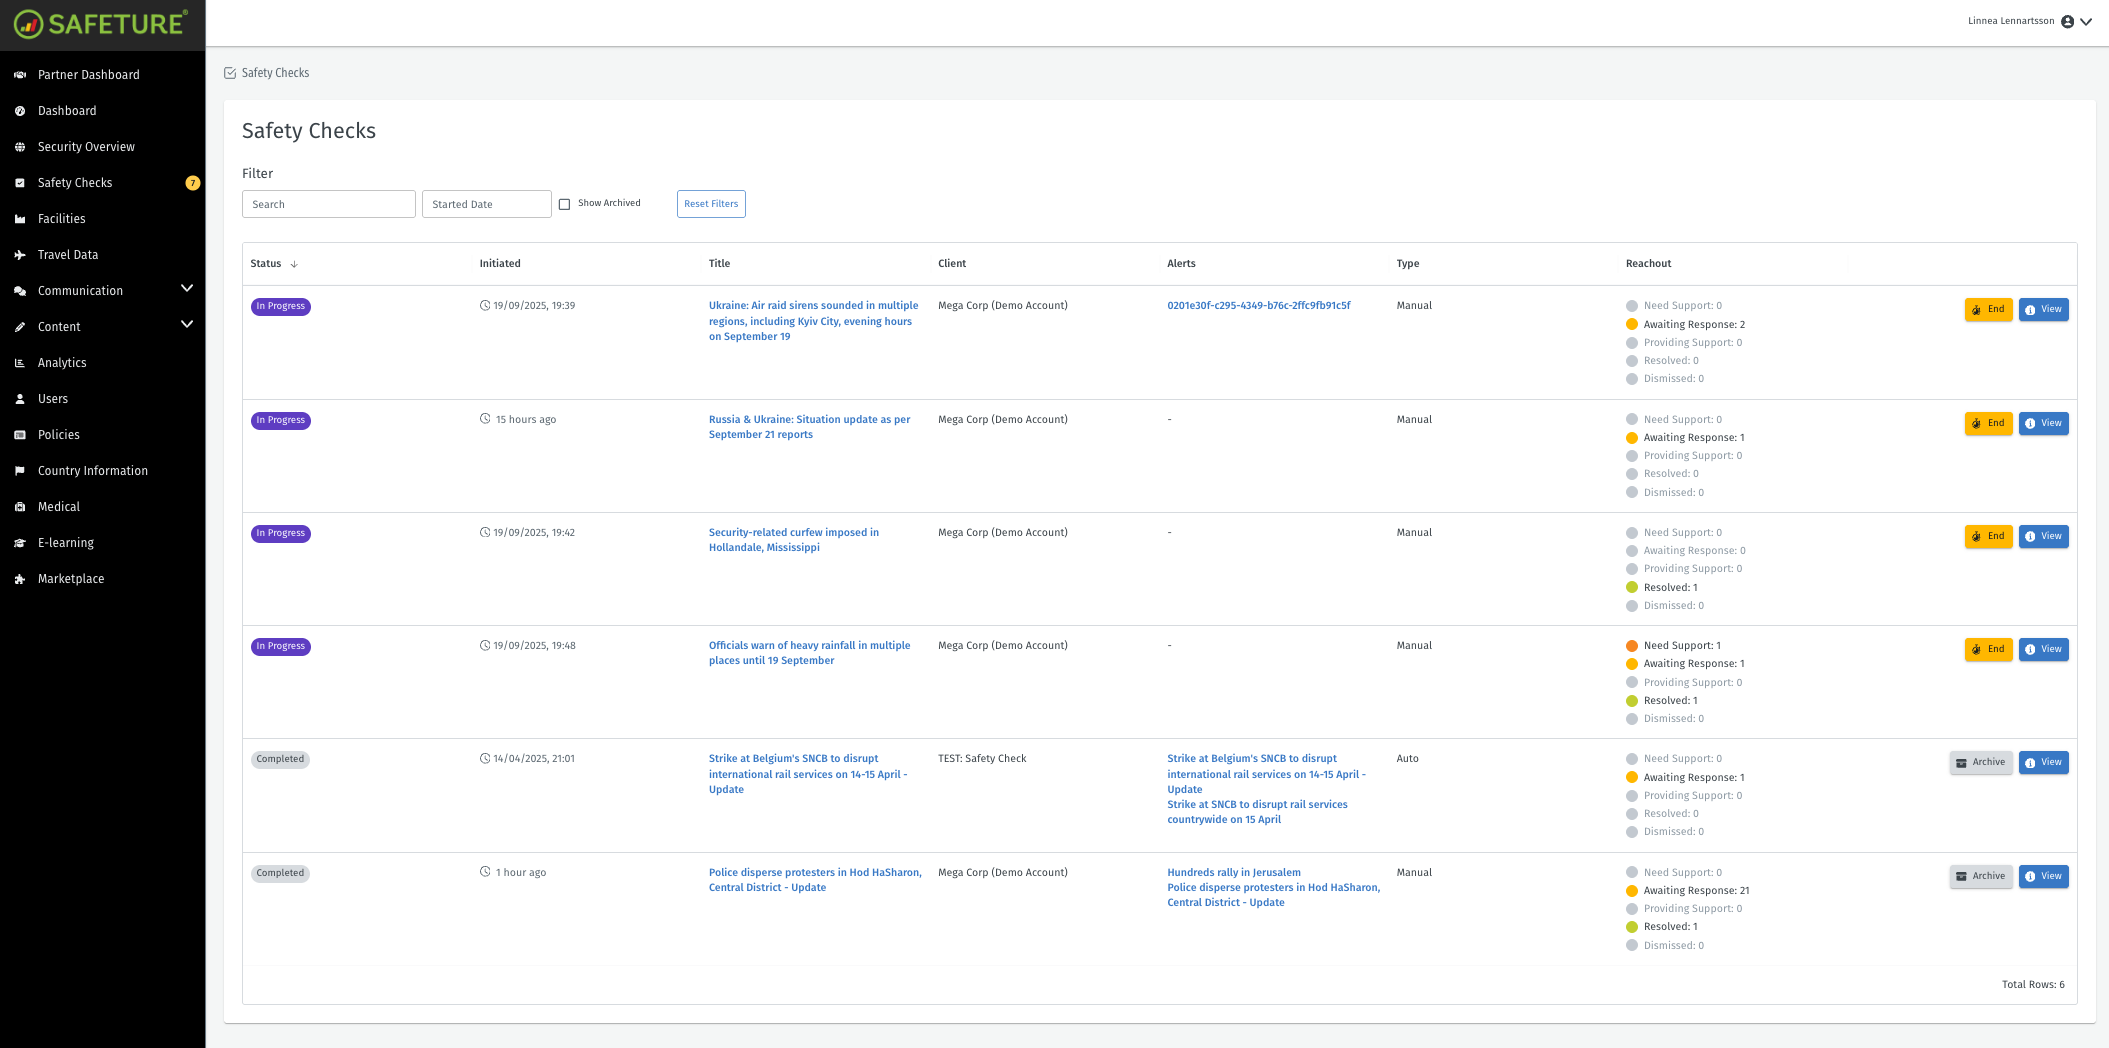
Overview of all Safety Checks
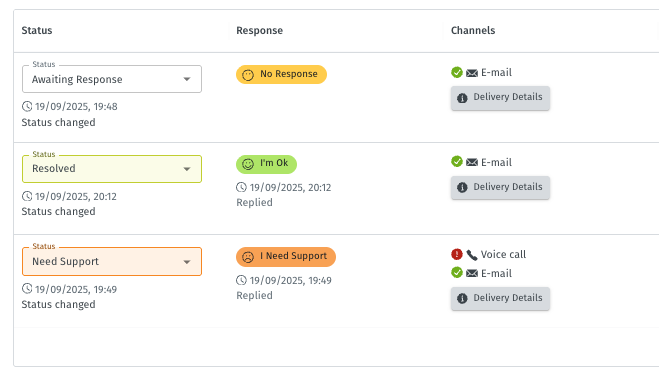
Reach Out Overview
On the Safety Check details page you can follow as responses come in and take action thereafter.
The response column will show either:
No Response – the person has not replied yet.
I’m OK – the person confirmed they are safe.
I need support – the person requested assistance.

Response column
In the Channels column, you can see which communication methods were used to contact the person. A green icon means the message was successfully sent from the platform, while a red icon indicates an error occurred.
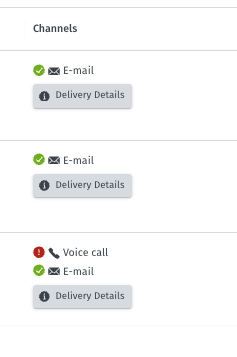
Each individual’s available channels
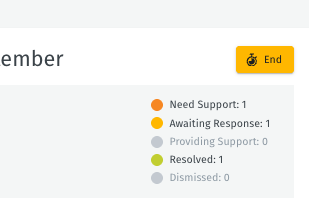
Keeping track of support progress
As responses come in, you can use the statuses in the left column to track who has received help, who still needs assistance, and who has yet to reply. These statuses complement the individual responses, giving you a clearer overview of the situation. Some update automatically, while others can be set manually as the incident handling process evolves:
Need Support: Automatically set when a person completes the Safety Check and requests assistance.
Providing Support: This status can be manually set by a responder to indicate that the situation is currently being handled.
Resolved: This status serves two purposes: it is automatically set when a person responds “I’m OK” to the Safety Check to show that no further actions are needed, and it can also be manually set by a responder once support has been provided to someone who requested support.
Dismissed: This status can be manually set by a responder to indicate that this person does not require further follow-up.
Statuses can be used to track support progress
Linking chats to a Safety Check
From the Chats tab, you can add specific chats and connect them directly to the Safety Check. This makes it easier to track conversations related to the incident in one place and ensures all communication is documented alongside the responses.
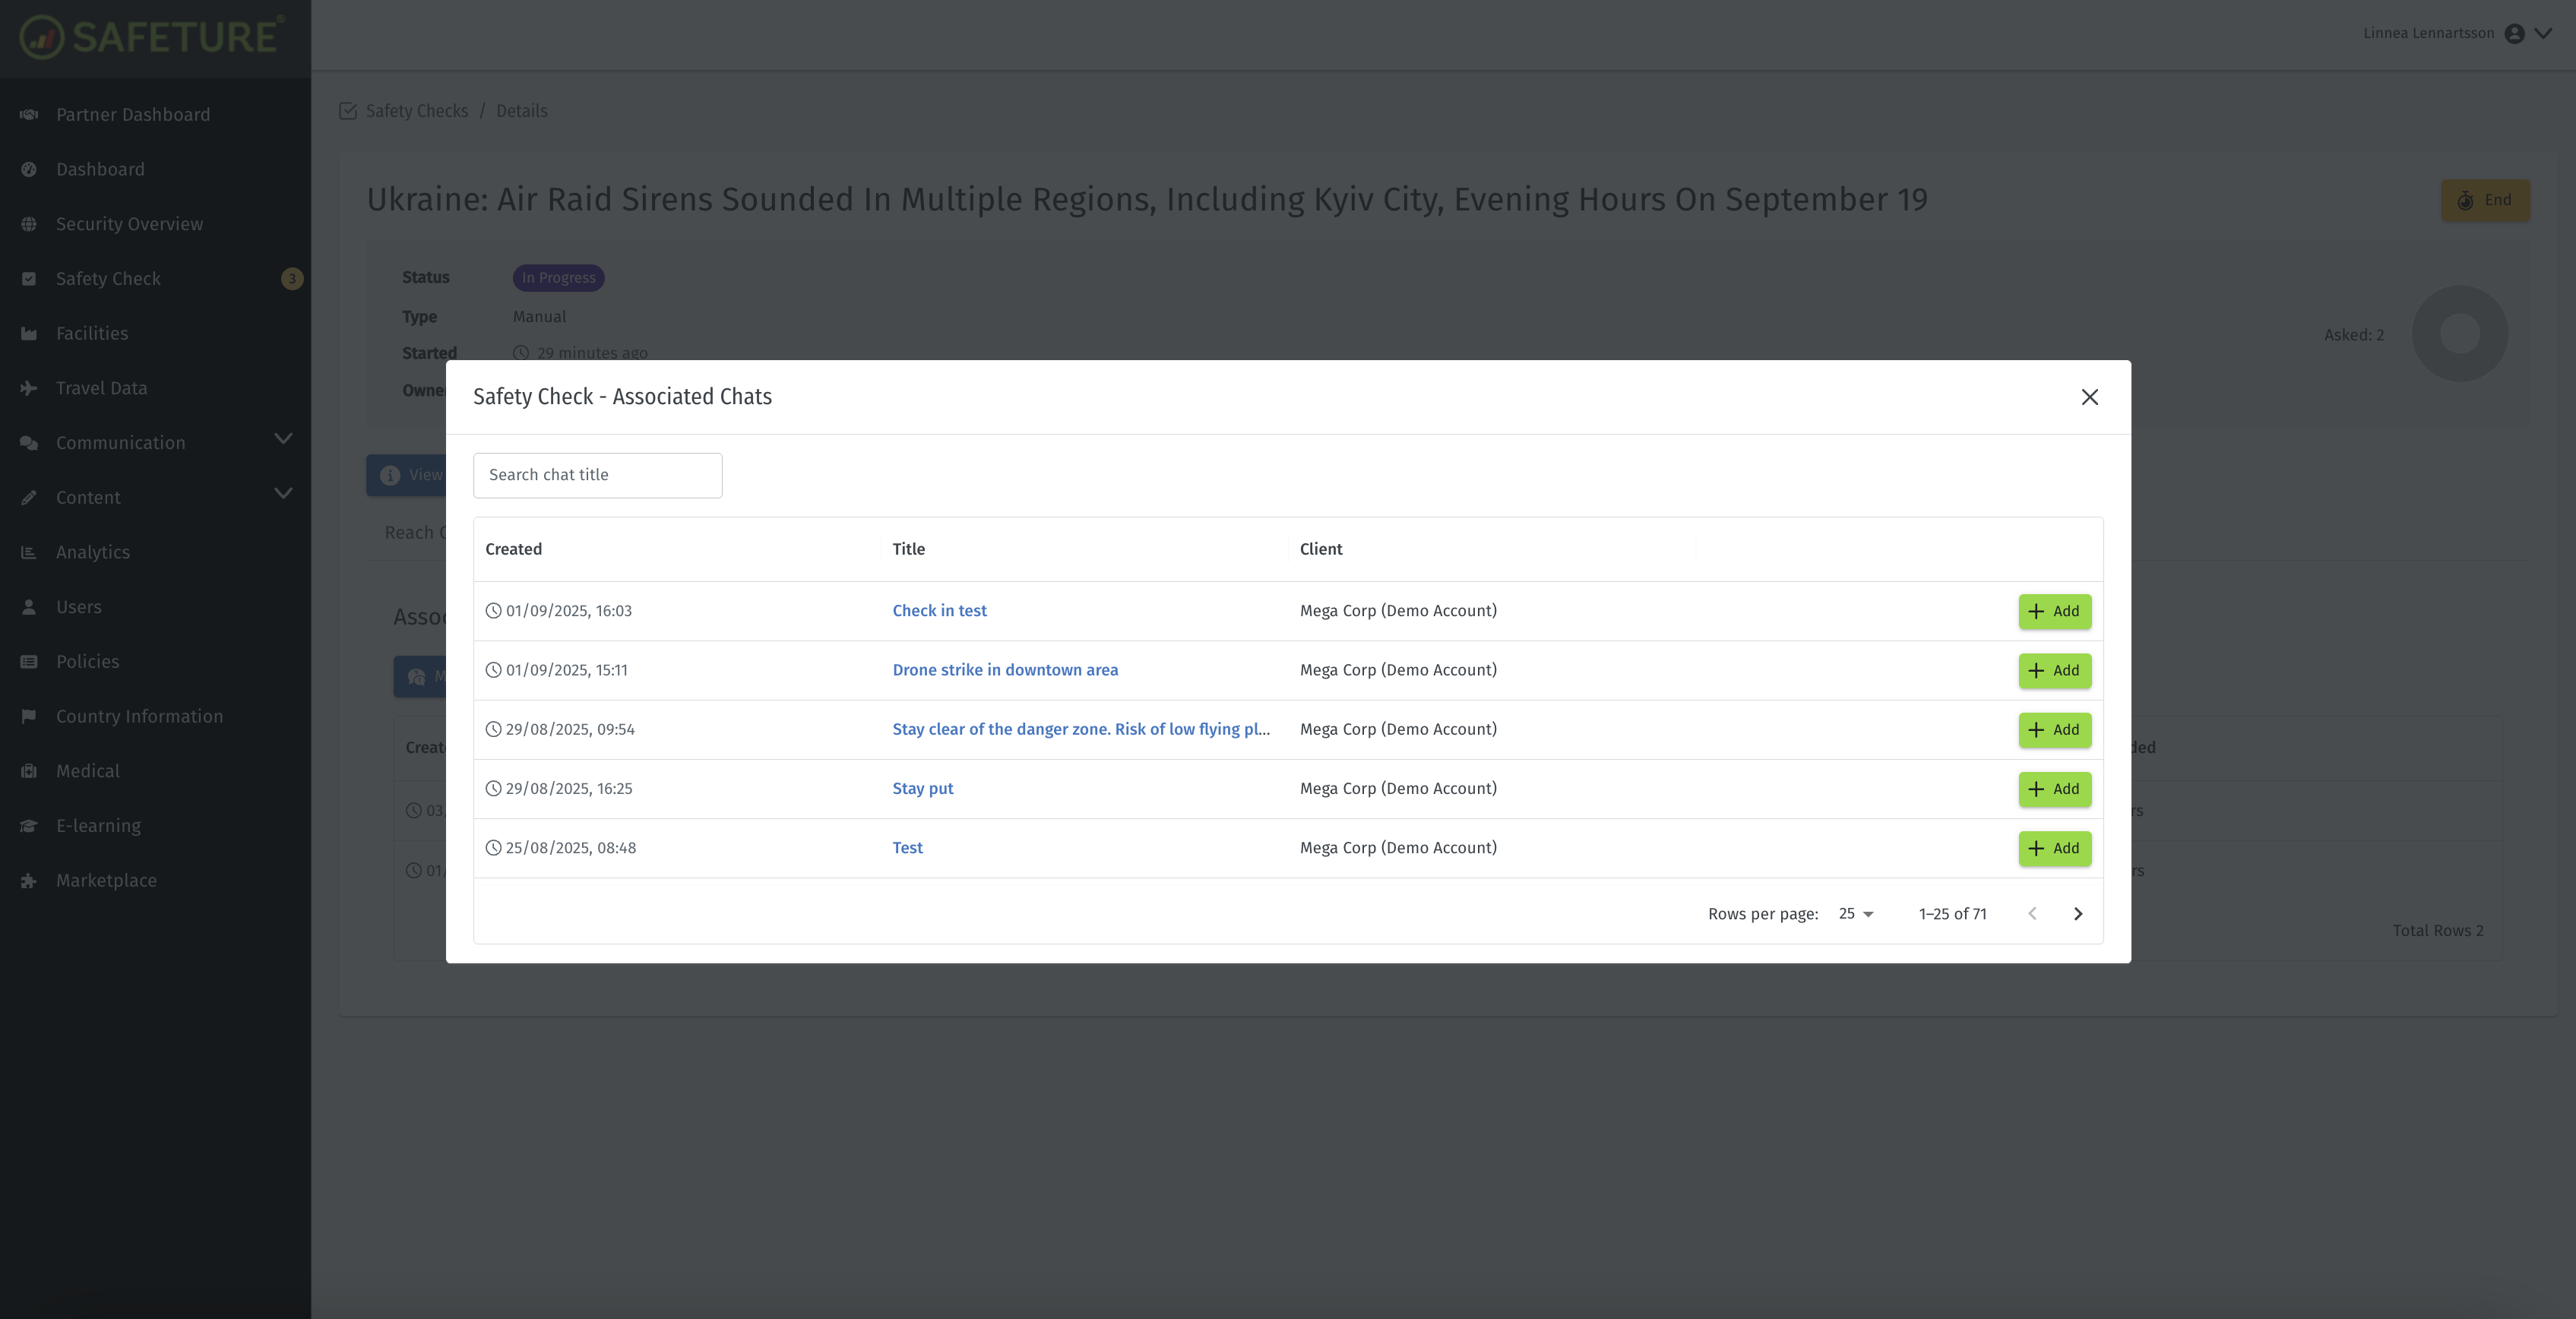
Add Associated Chats
Adding Notes for Individual Persons
You can add notes for each person by clicking the blue pen icon on the right side of the column. Notes are especially useful for documenting progress and ensuring smooth handovers between shifts.

Click the blue edit button to add notes for a specific person
Adding Notes for the Entire Safety Check
In addition to adding notes for individual people, administrators can also add notes for the entire Safety Check. To do this, go to View Details and enter the notes at the Safety Check level. This is useful for documenting overall progress, important decisions, and key context for the incident.
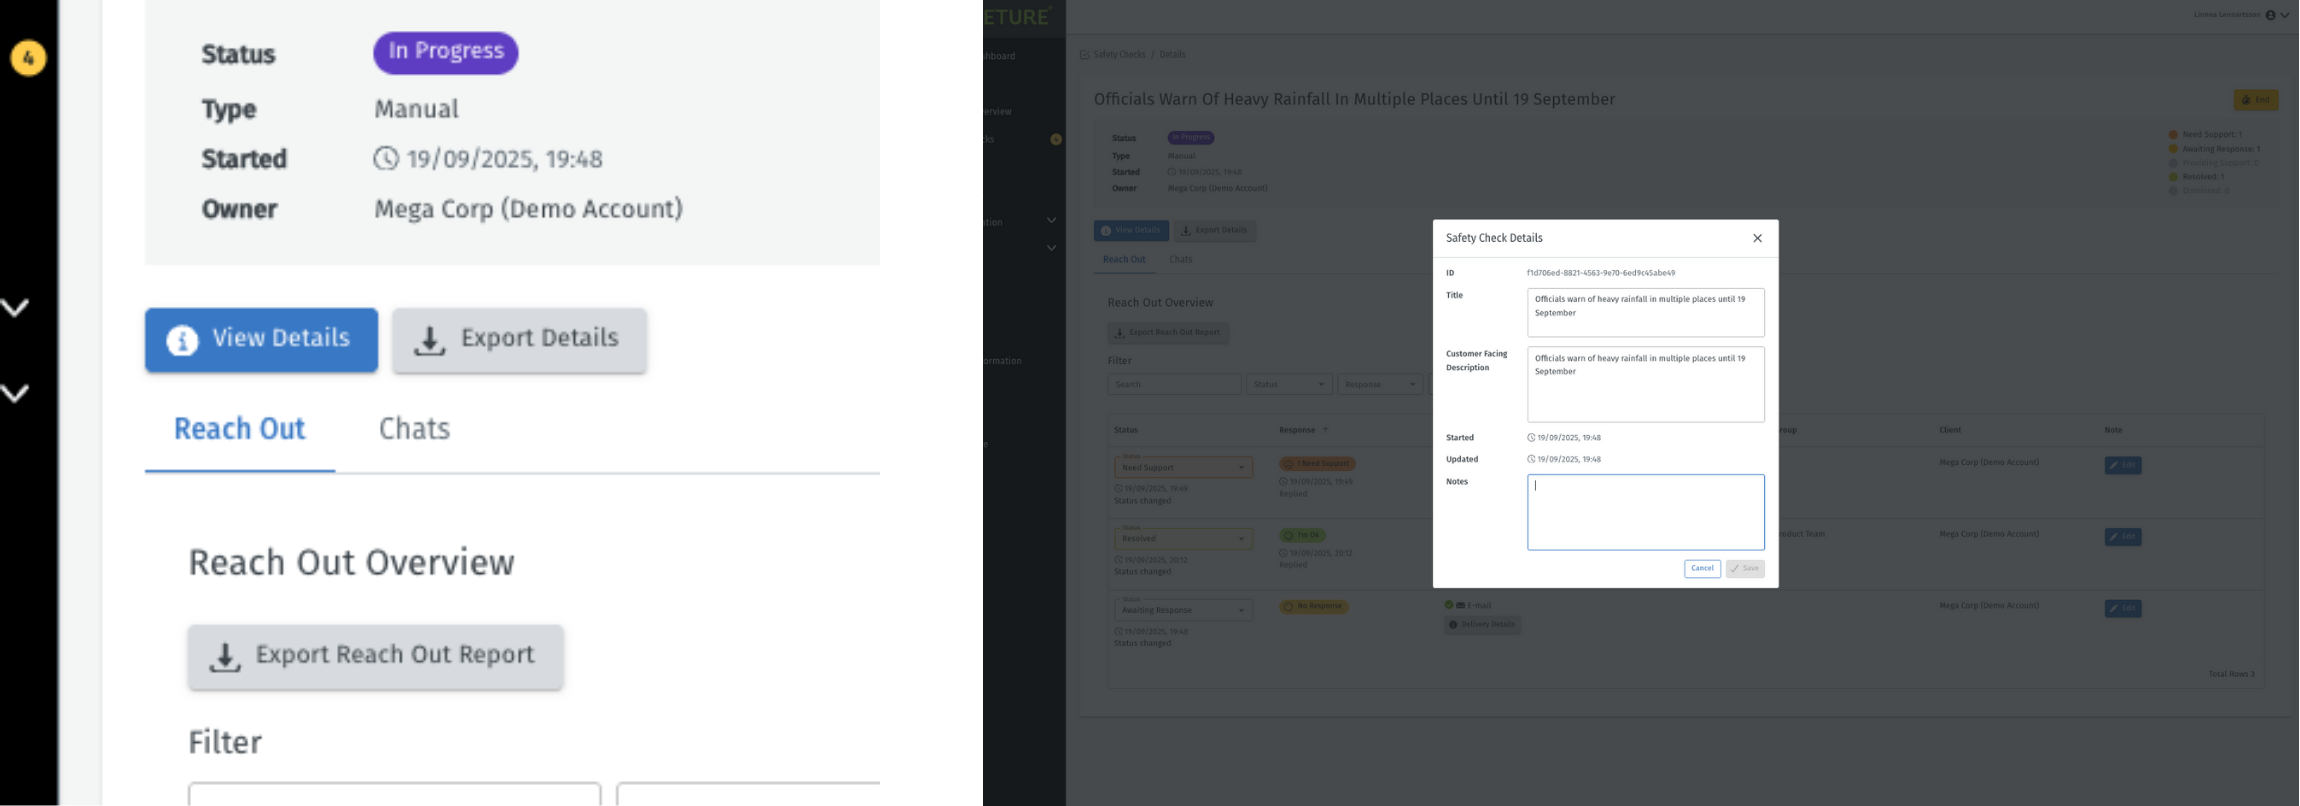
Go to “View Details” to add notes covering the full Safety Check
Ending the Safety Check
Once all responses have been received and you’ve confirmed the safety and whereabouts of everyone included, you can close the Safety Check by clicking End in the top-right corner. Ending a Safety Check locks it, meaning no further changes can be made and no additional responses will be collected. Once a Safety Check is ended it cannot be reopened.