Using the Documents & Messages features
This guide will walk you through the process of sending a message using the Documents and Messages features in the Communication Module. The new features will replace One-Way Messages. Similar to one-way messages, the new messages cannot be replied to by end-users and should be used when you don’t need a reply from the recipients.
How to send a message using Documents & Messages
Navigate to the Messages section of the Communication Module
Start by navigating to the Messages section of the Communication Module. Open the main menu on the left-hand side and click Communication > Messages.
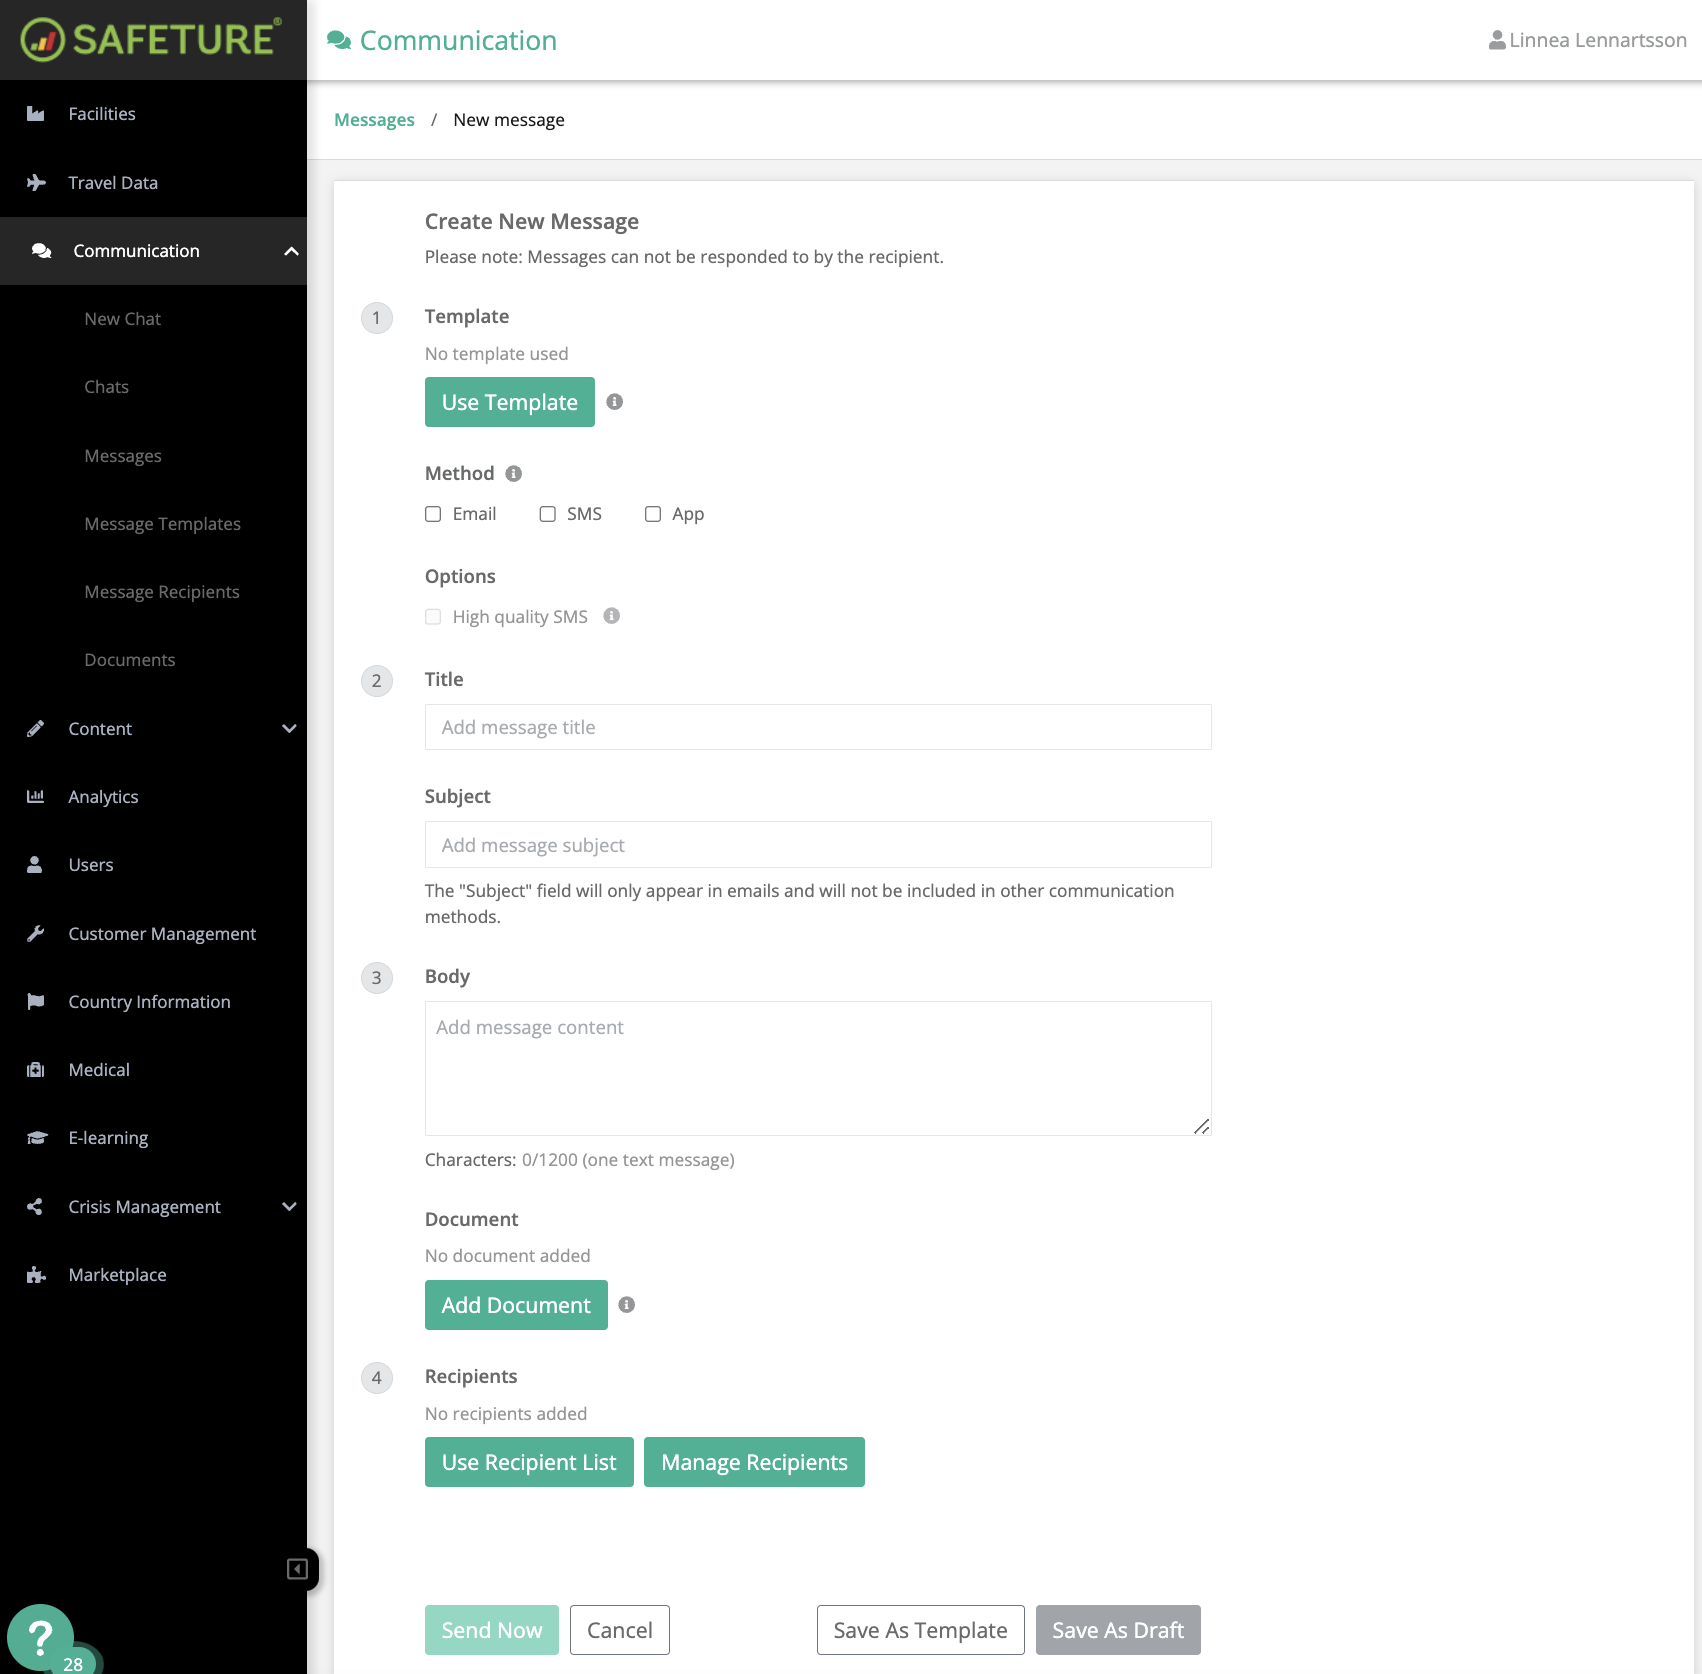
Create new message
Click “New Message” and start filling in the requested information:
Template: To expedite the creation of new messages, you can utilize a previously crafted template. If you want to save the message you are currently working on as a new template, simply click "Save as Template" at the bottom of this page.
Method: Choose delivery methods. Messages can be sent via email, text message, or push notifications (for app users). If you are unsure how to reach the intended recipients, please select all. Please note that not all methods may be sent to all recipients, depending on whether the phone number is available for the user or if the user has the app installed.
Options: High-quality SMS allows for adaptive SMS routing, which means that the system will resend failed text messages using different routes to improve the chances of delivery. However, this may increase the cost per text message. If this option is disabled, the system will only send one text message per recipient.
Title: Internal name of the message. Not visible for message recipients.
Subject: Message subject (only included in Email).
Body: Text content of the message. The number of characters depends on the selected delivery method.
Document (add-on): If you wish to include a document in the message you can do so here. You can upload any type of file. The file will appear as a link, that prompts the user to log in to the web portal when you click it. This is to prevent any unauthorized use of the information in the document. Maximum file size is 100MB. Please note that uploaded documents are not deleted automatically based on the account’s retention period; they must be deleted manually by an account administrator.
Create new message
Add Recipients
Add recipients in the final step. You can either use a previously created Recipient List , or click “Manage Recipients” to manually add Recipients with our advanced filter options.
Send Message
Once you've completed your message, you can either send it immediately or save it as a draft for later. Go back to Messages to see all drafts and sent messages.
Send a message from other parts of the web portal
The Message feature will be accessible through various parts of the web portal, including the Partner Dashboard, the Dashboard, and the Security Overview. The Security Overview is already accessible, while the Partner Dashboard and Dashboard functionalities will be deployed during the beta test period.
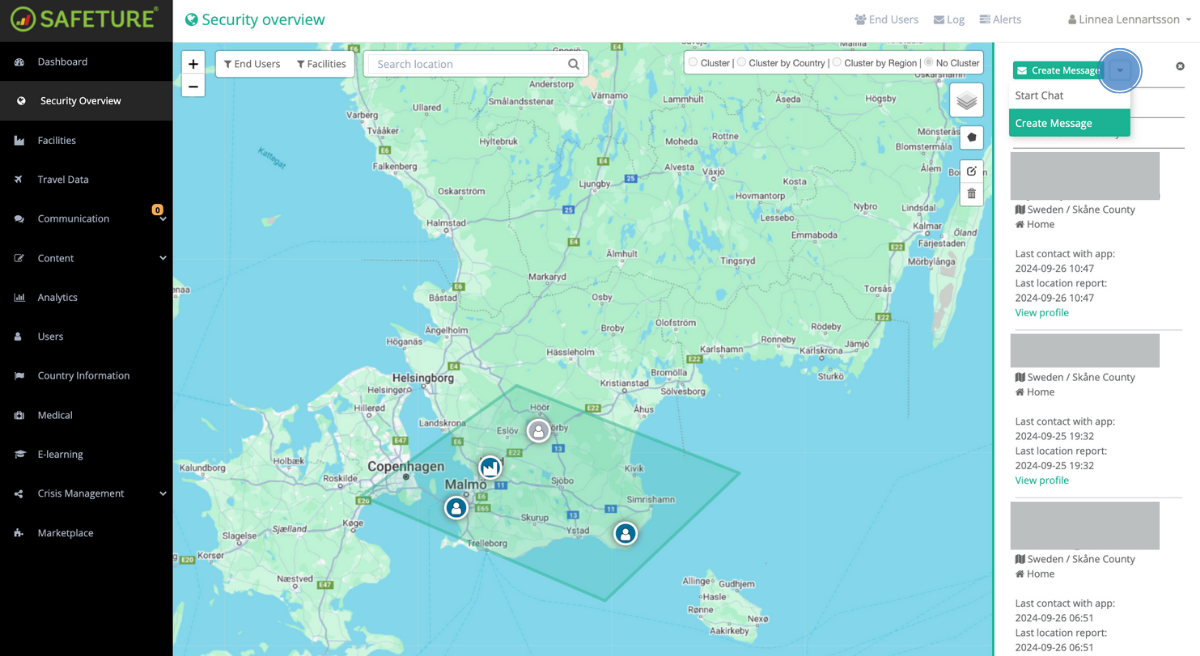
Security Overview
You can send a message from the security overview map by using the polygon tool to select the group of assets you wish to message. After selecting your recipients, click “Create Message” in the top right corner. Please note that when you include a facility, all users connected to that facility will receive your message.
Security Overview Polygon tool