
What is a scheduled check-in?
Scheduled check-in is a Safeture feature that lets administrators automate the process of making sure their people are ok.
With scheduled check-ins, you can set time intervals in the web portal of when you want end-users to manually report their location through the Safeture app and thereby confirm that they are ok.
The system will remind end-users of an upcoming check-in, and a missed check-in will trigger notifications to selected administrators. Schedules can be set on a weekly basis for both individuals and groups of users.
Note: This functionality is an add-on to the standard Safeture Platform, and additional permissions are set up by the Safeture Client Development Team.
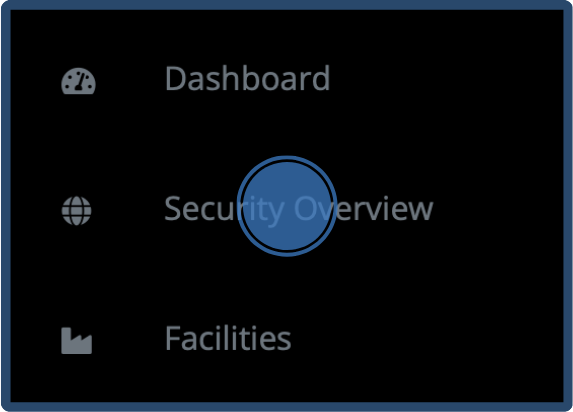
Navigate to the Security Overview and click “Scheduled Check-ins”
1. Click ” Add Scheduled Check-in”
To schedule a new check-in, click the green button at the top right corner.

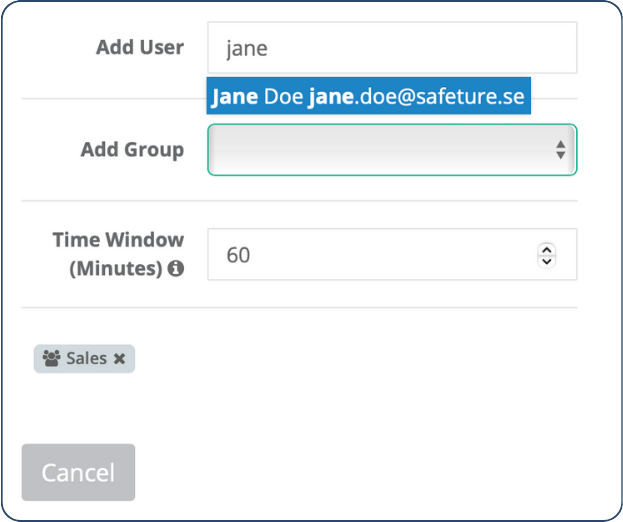
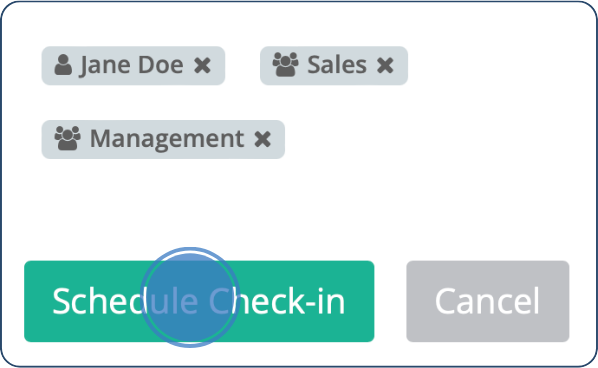
2. Add users
You can add users either by searching for individual users or adding groups of users. When added, they will appear in grey boxes below.
Note: Schedule check-ins will only work for users with the Safeture app installed.
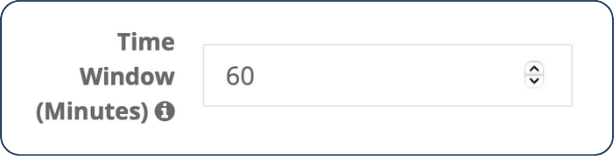
3. Set a time interval for the check-in
The time window decides the number of minutes before the chosen check-in time that the user can check in with the app.
If a scheduled deadline is set to 10:00 and the Time Window is 60 minutes, the users can check in via the app anytime between 09:00-10:00 to fulfill the requirements and not trigger any alarms.
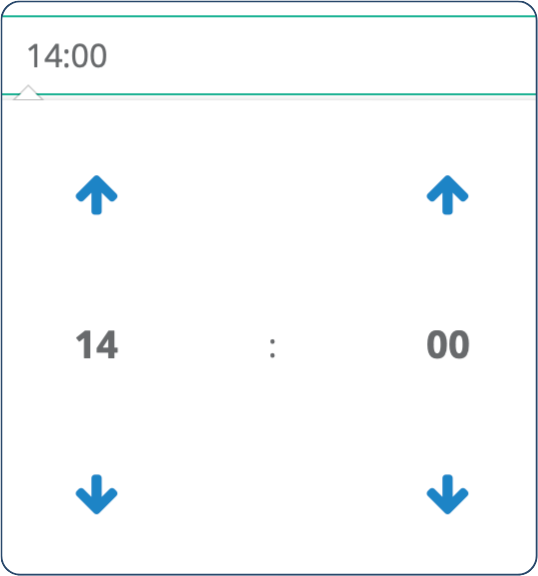
4. Set the check-in time
Decide at what time the check-in should be targeted, i.e. the deadline.
Note: the set check-in time will be according to each end user’s last known time zone. This means that a group of users will receive the check-in notification at different times if they are located in different time zones.
5. Choose what weekdays you want the check-in to apply to
Choose which weekdays the check-in should be targeted by clicking on the circles of the right weekdays. When selected, they will turn blue.
Note: You can select multiple weekly setups for each scheduled instance, enabling you to have different time stamps set for different weekdays.
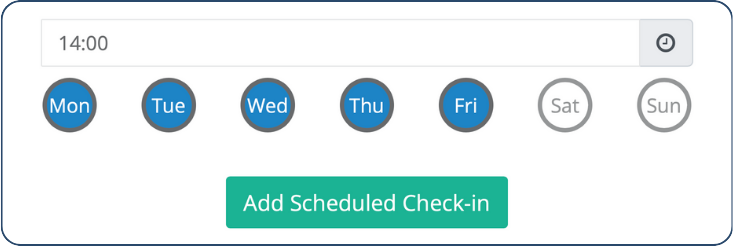
6. Click “Add Scheduled Check-in”
Click on the green button “Add Scheduled Check-in” to add the chosen check-in setup.
If you wish to add another check-in setup for the same selection of users, you select a new check-in time and set of weekdays and click the green button once again.
.png?cb=3e26972cef3eba7b0ab2a08a78d2a30e)
7. Save your check-in/-s
To save the check-in setup/-s, click “Schedule Check-in” in the bottom-left corner of the page.
What happens if a check-in deadline is missed?
When a check-in deadline has been missed by one or more users, the system will trigger notifications to the administrators and inform them of the situation. Also, a separate widget will appear on the web portal dashboard.
The users with a missed check-in will be represented on the risk map in the Security Overview by an orange icon.
It is possible to activate notifications (email subscription) for missed scheduled check-ins. Note that this is not enabled by default. Click here for information about how to activate it (see step 5).