
Last updated: September 1, 2026
Introduction to Scheduled check-ins
Via the app, users can check in to let their administrators know they are OK. Administrators can also schedule requests for users to check in. This is done in the Scheduled Check-ins module, which is available as an add-on and and can be accessed from the top menu in the Security Overview.
Types of check-ins
Check-ins can be scheduled as one-time check-ins, multiple check-ins over a specific period, or ongoing check-ins that continue until manually ended by an administrator.
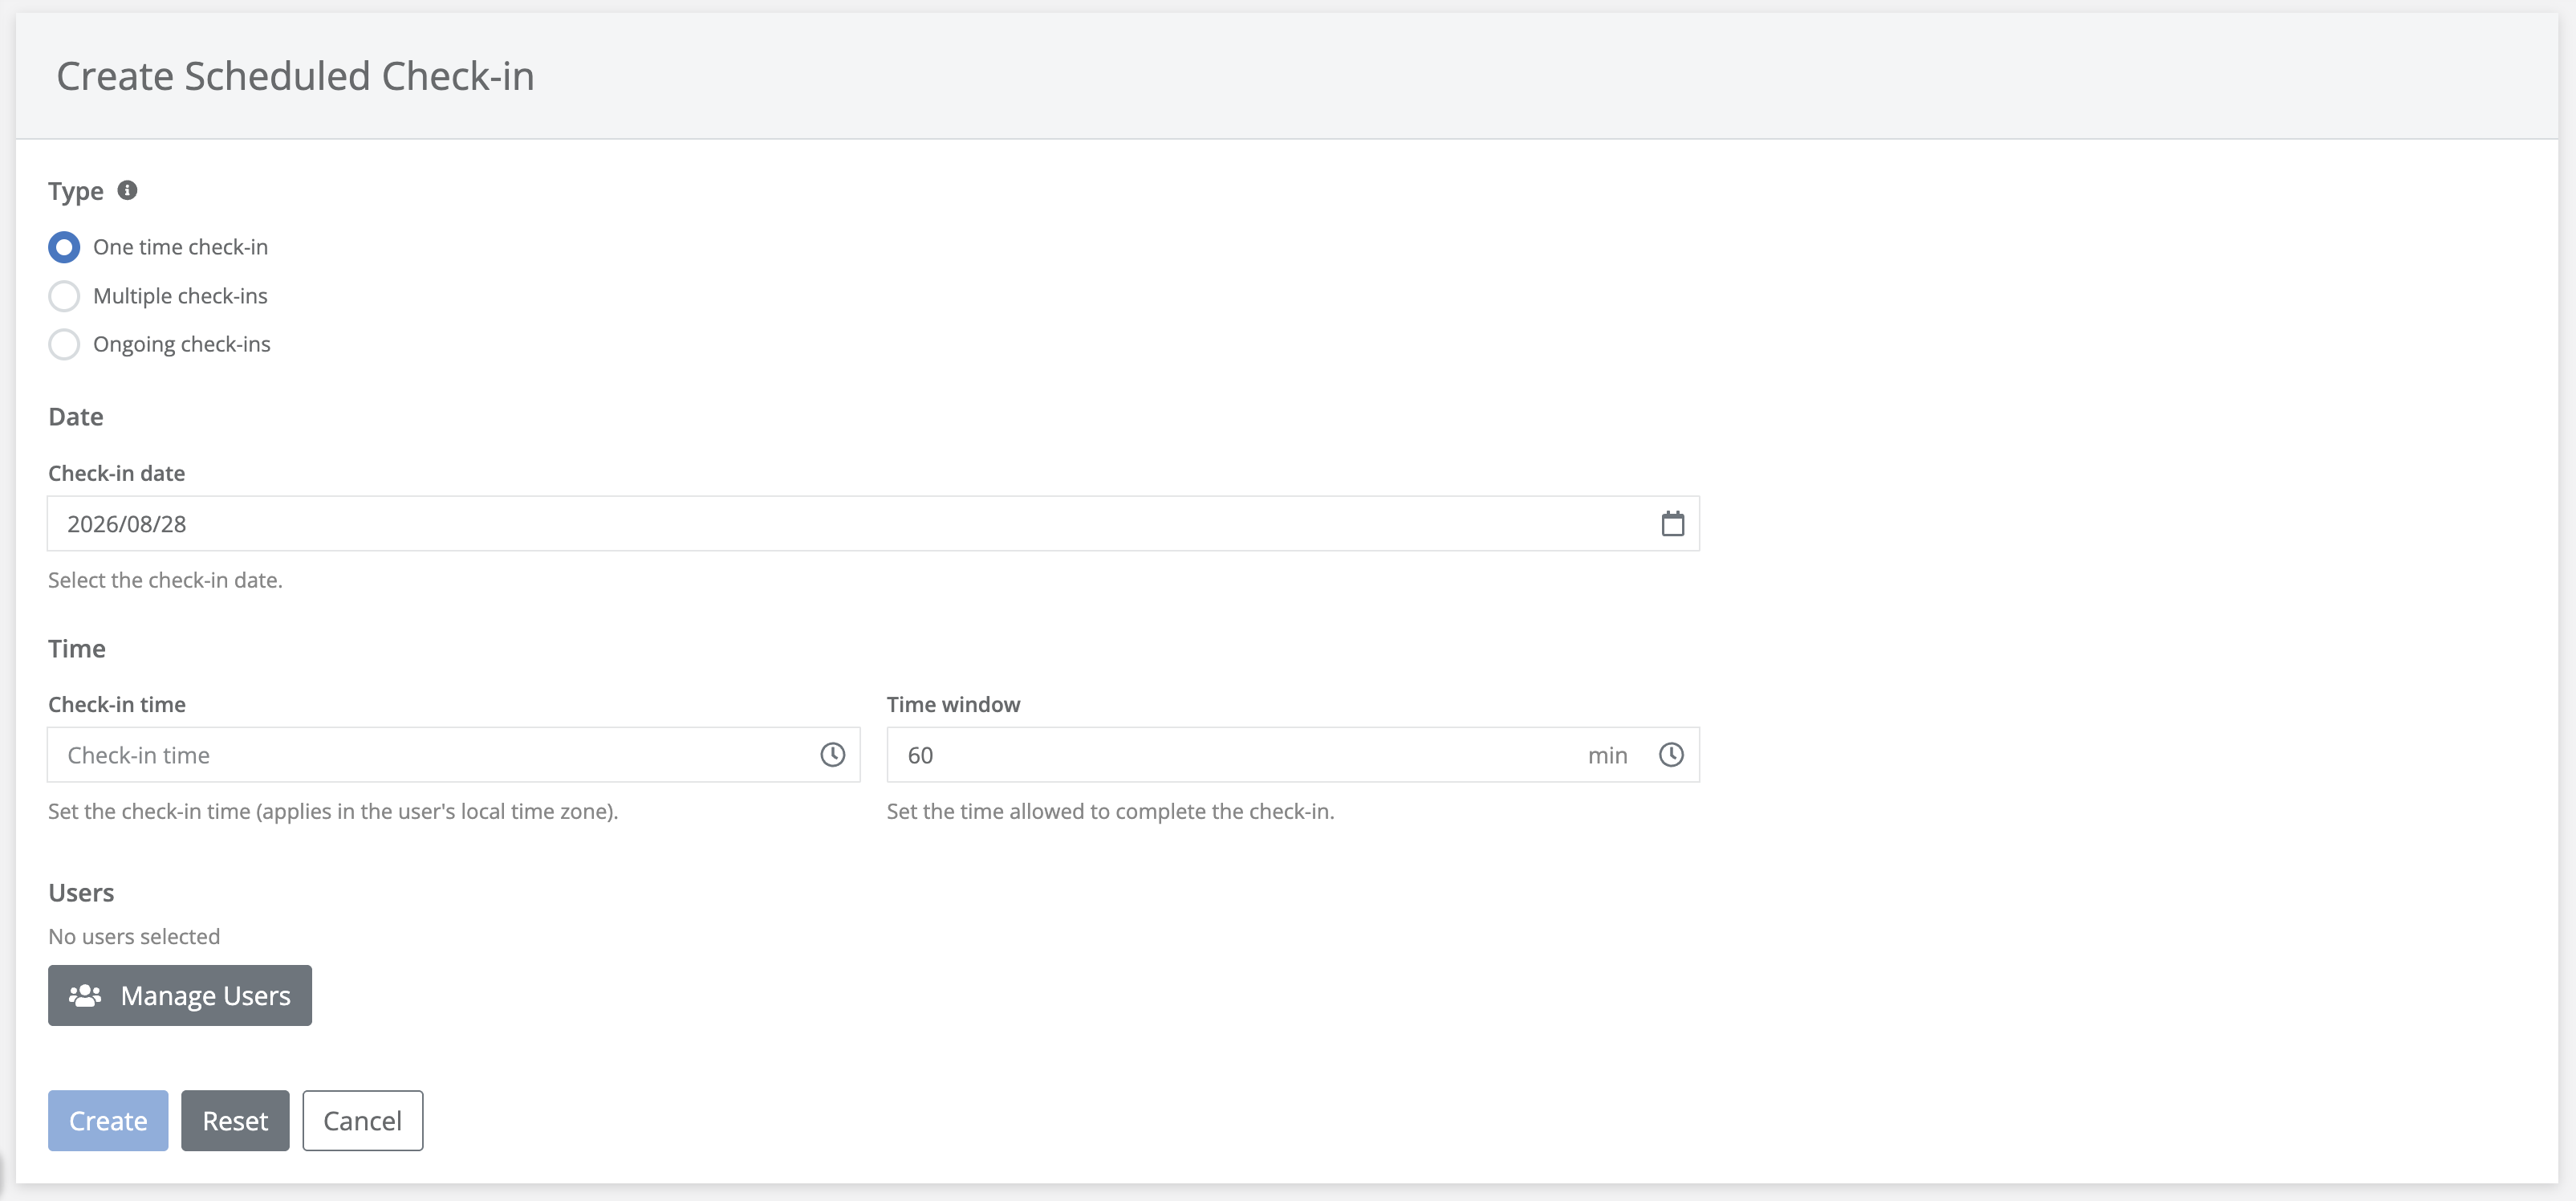
How to set up a one-time check-in
One-time check-ins are intended for situations where administrators want to schedule a single check-in for a specific trip or event. For example, a check-in can be scheduled for shortly after a traveling user is expected to arrive at their destination.
An administrator can set up a one-time check-in from the Scheduled Check-ins module:
-
Click the blue New scheduled check-in button.
-
Select One-time check-in.
-
Select the date when the user should check in.
-
Set the time when the user should check in.
-
Set the time window, which determines how long the user has to complete the check-in.
-
Add the user or users who should check in from the People Directory.
-
Click Save.
How to set up Multiple check-ins
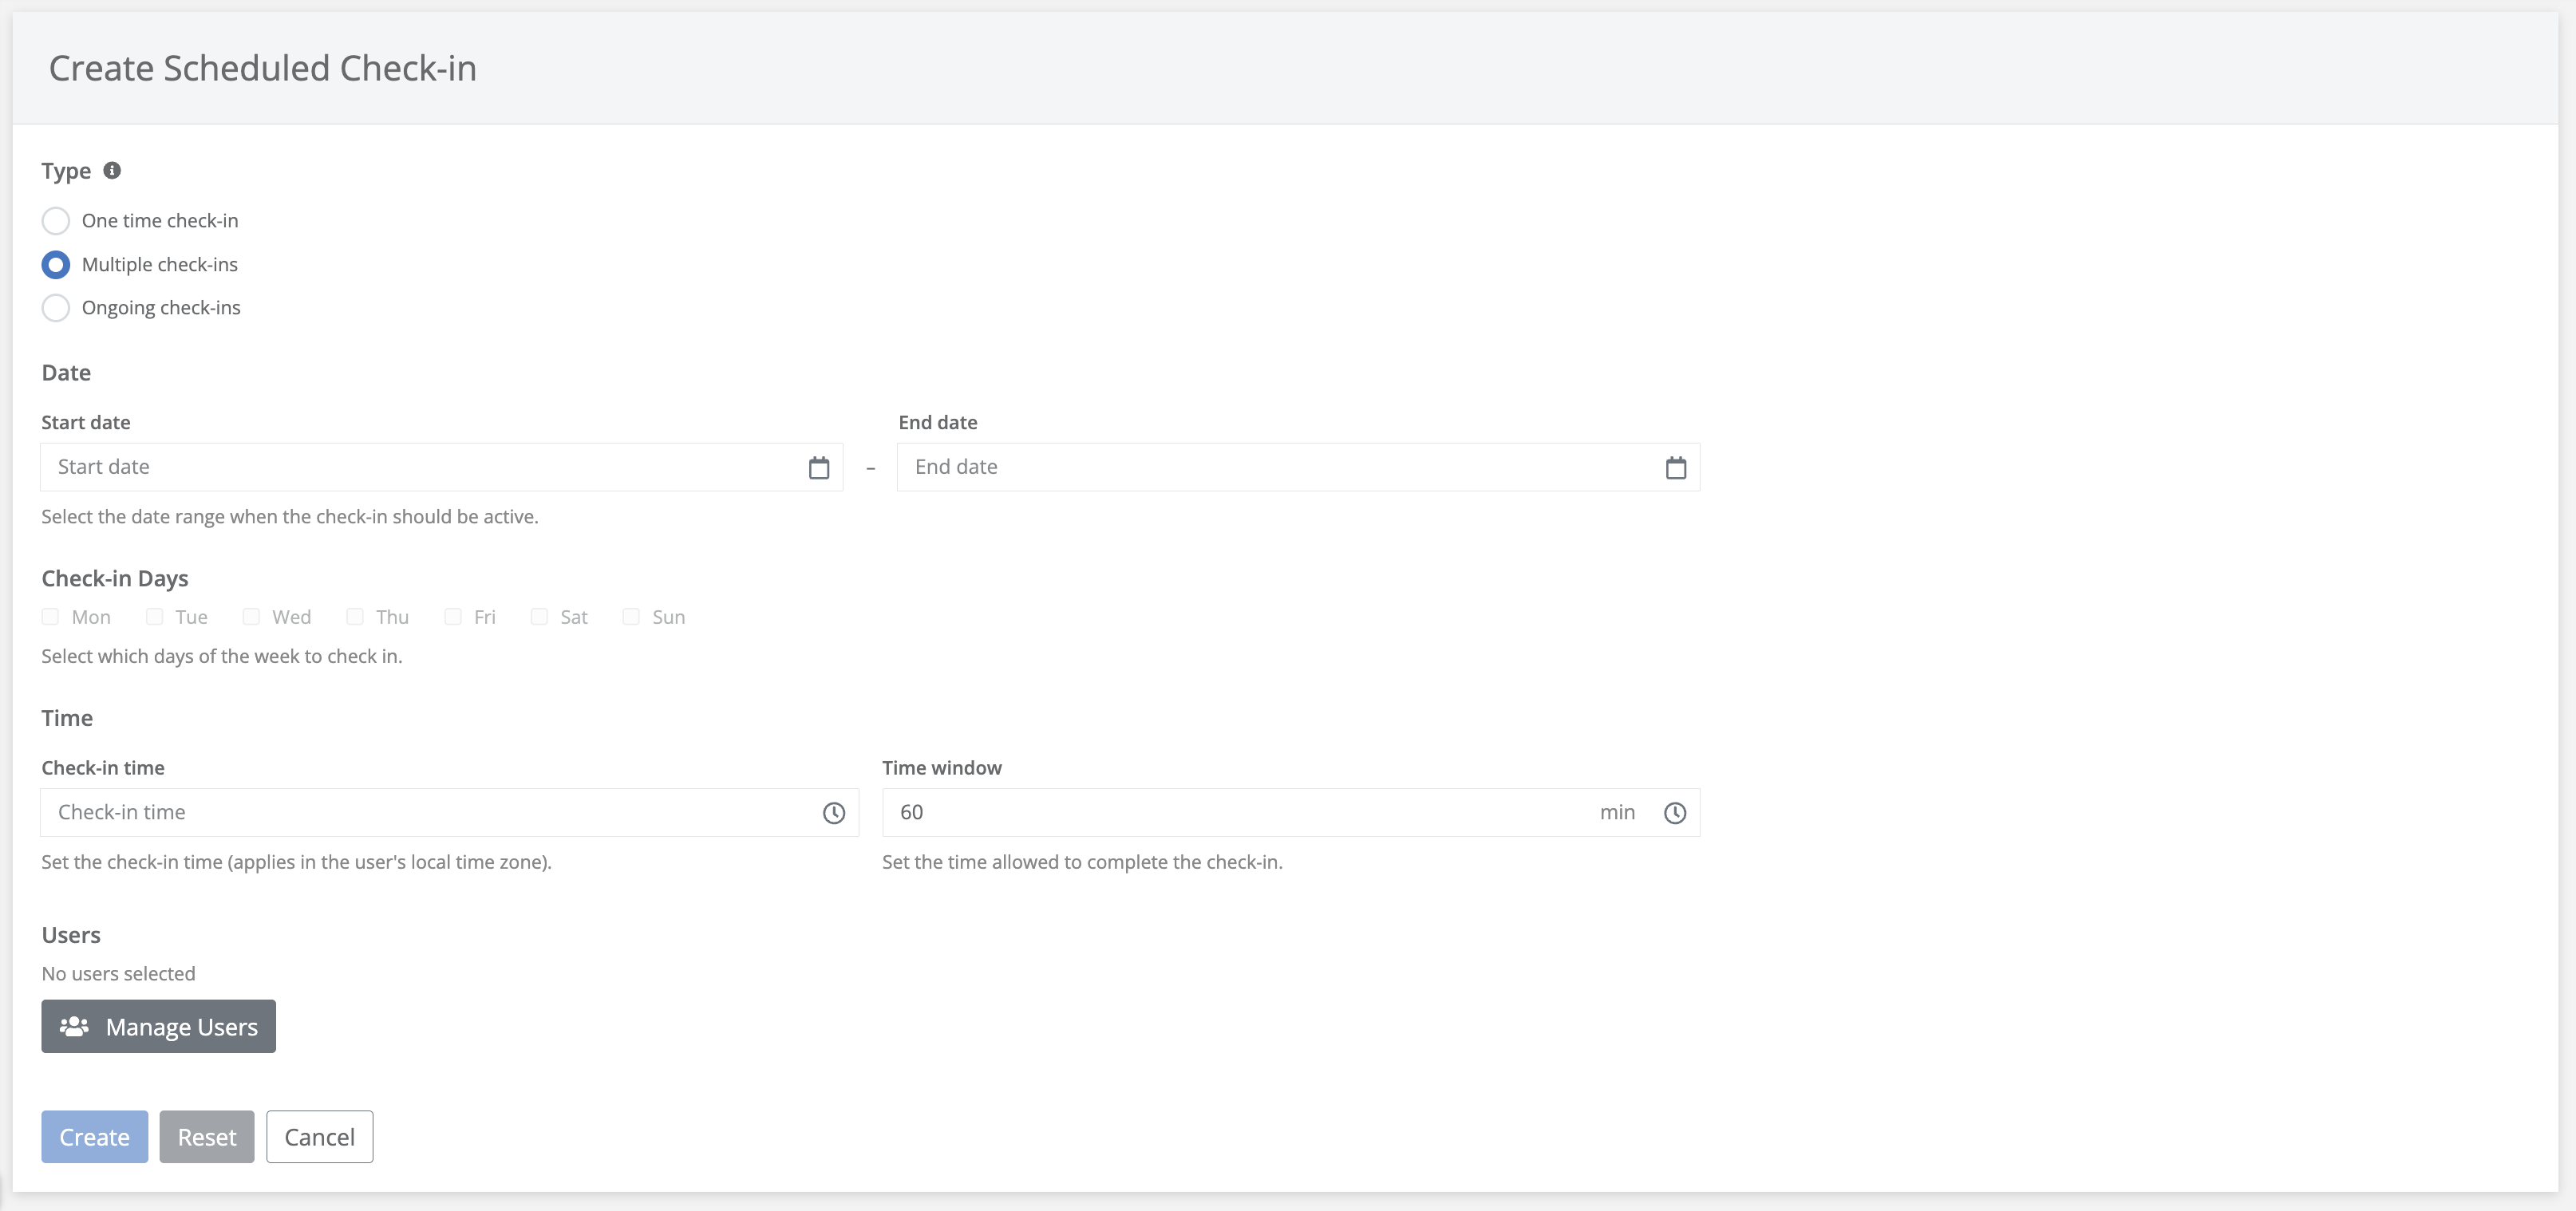
Multiple check-ins are intended for situations where administrators want users to check in regularly over a specific period. For example, if a user is traveling in a high-risk country for two weeks, recurring check-ins can be scheduled throughout the trip to confirm that the user is OK.
Schedule the check-ins by following these steps:
-
Select the date range during which the check-ins should be active.
-
Set the time when users should check in.
-
Select the days of the week when users should check in.
-
Set the time window, which determines how long users have to complete each check-in.
-
Add the user or users who should check in from the People Directory.
-
Click Save.
Ongoing check-ins
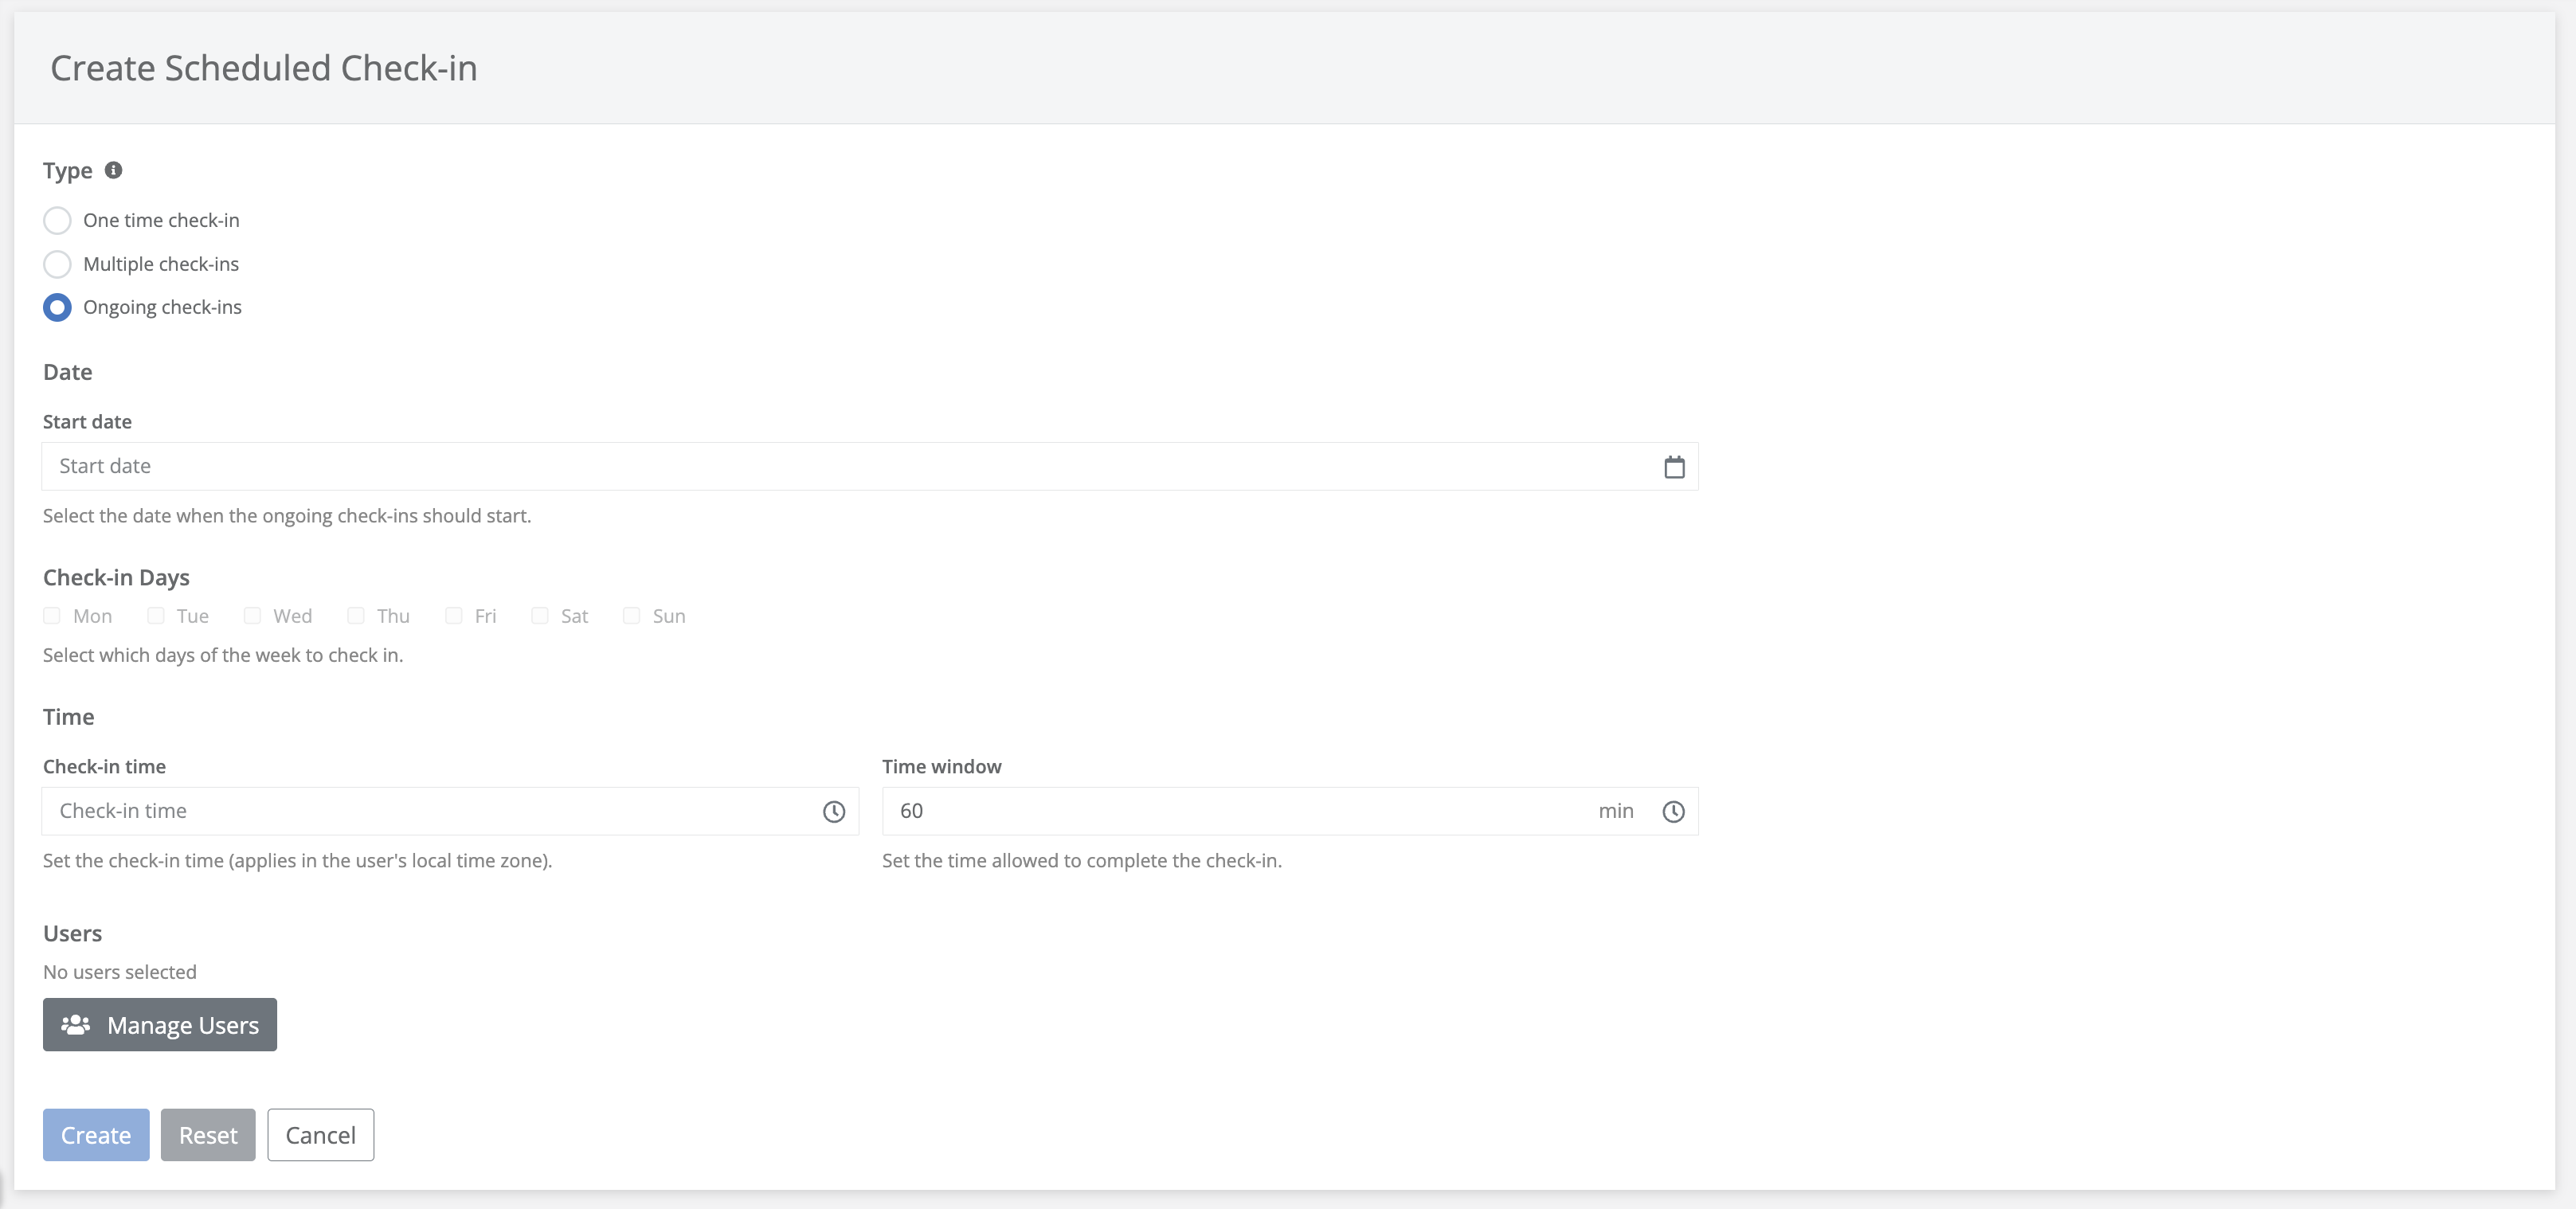
Ongoing check-ins are intended for situations where administrators want users to check in regularly without a set end date. The check-ins continue until they are manually stopped by an administrator.
Schedule ongoing check-ins by following these steps:
-
Select the date when the ongoing check-ins should start.
-
Set the time when users should check in.
-
Select the days of the week when users should check in.
-
Set the time window, which determines how long users have to complete each check-in.
-
Add the user or users who should check in from the People Directory.
-
Click Save.
When a user misses a scheduled check-in
When it’s time to check in, the user receives a notification in the app prompting them to check in. If the user does not check in, additional reminders are sent throughout the set time window.
If the user has not checked in by the end of the time window, the check-in is marked as missed. Administrators are then notified via email, and a Missed scheduled check-ins widget appears on the Dashboard in the web portal.
All check-ins follow the user’s current time zone. For example, if an administrator schedules a check-in for 10:00 and the user is in Stockholm on the day of the check-in, the user will be prompted to check in at 10:00 Stockholm time. This applies to all types of check-ins.
Because check-in times are based on each user’s local time, the Missed Scheduled Check-ins widget may sometimes appear inconsistent from the administrator’s perspective. A user in another time zone may appear in the widget even though the check-in deadline has not yet passed in the administrator’s time zone. Similarly, a user’s local check-in deadline may already have passed even though it has not yet passed for the administrator.